> ## Documentation Index
> Fetch the complete documentation index at: https://requestnetwork-07-14-docs-api-document-payer-eoa-address-in.mintlify.site/llms.txt
> Use this file to discover all available pages before exploring further.
# Dashboard
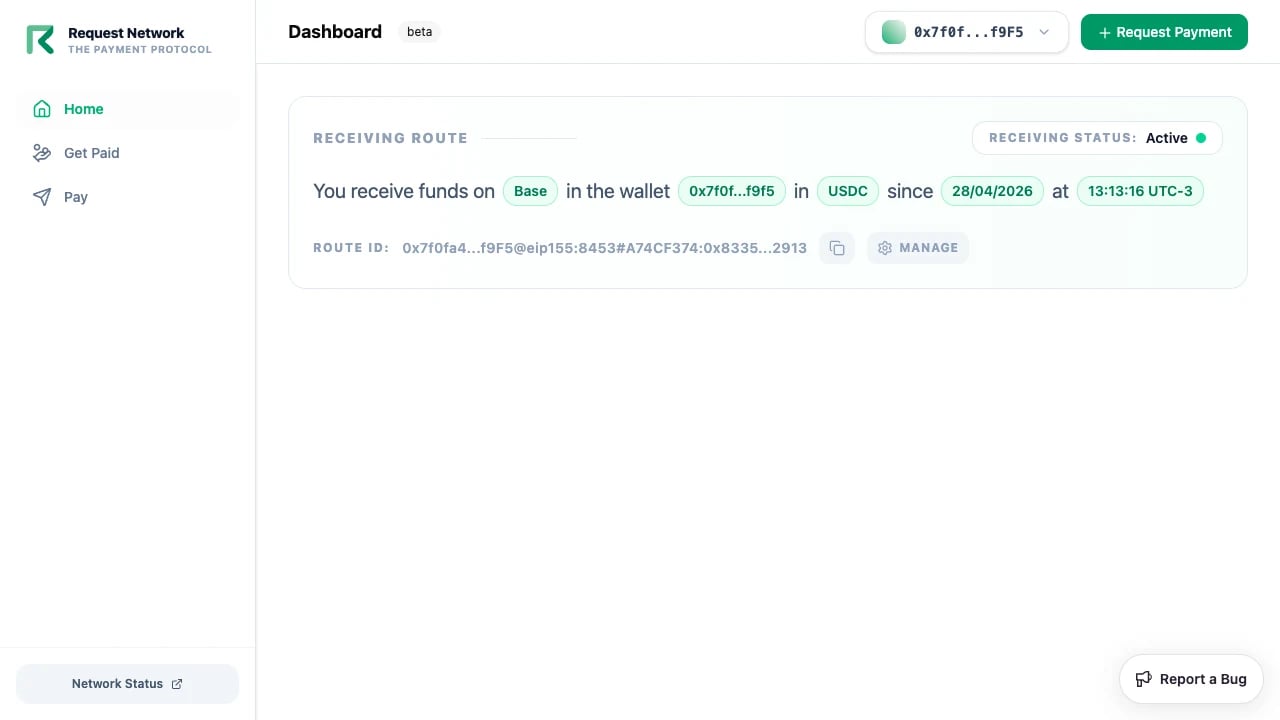
> dashboard.request.network — sign in with your wallet to manage payment destinations, Client IDs, incoming payment requests, and outgoing payouts.
The **Request Network Dashboard** ([dashboard.request.network](https://dashboard.request.network)) is the no-code home for everything you do with Request Network as a receiver: setting up where you want to be paid, generating API credentials, sending and receiving payment links. Sign in with an EVM or Tron wallet — no email, no password.
 ## Sign-in
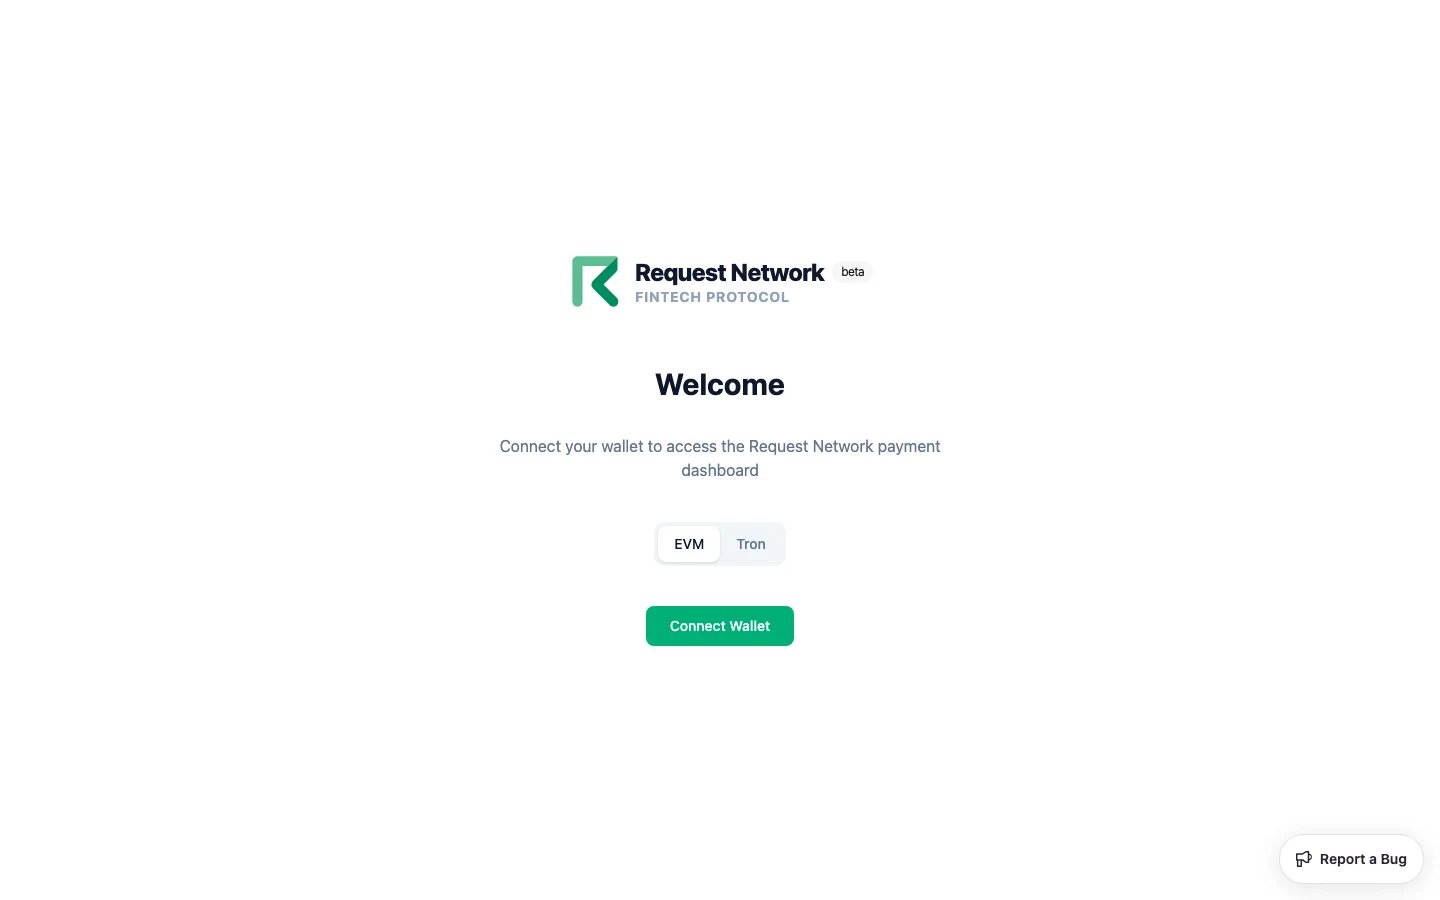
The login screen offers EVM and Tron as parallel tabs.
Connect MetaMask, Coinbase Wallet, or WalletConnect. Sign the SIWE message when prompted to start your session.
## Sign-in
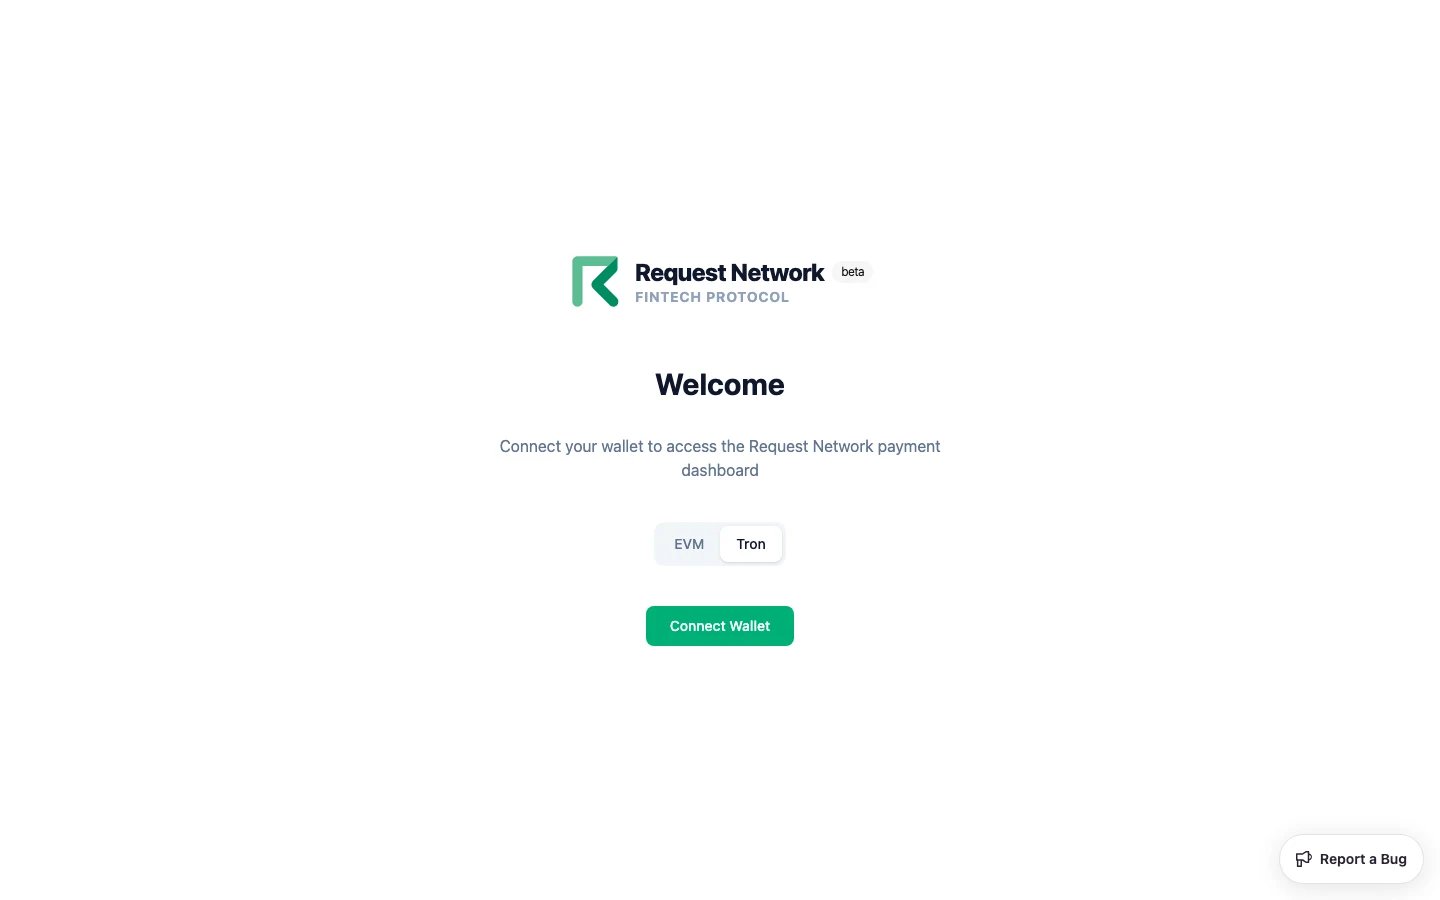
The login screen offers EVM and Tron as parallel tabs.
Connect MetaMask, Coinbase Wallet, or WalletConnect. Sign the SIWE message when prompted to start your session.
 Connect TronLink, Guarda, Trust, or WalletConnect-Tron. Sign the message when prompted to start your session.
 Your session is a wallet-bound cookie with a 15-minute idle timeout, shared across `dashboard.request.network`, `auth.request.network`, and `api.request.network` — sign in once and you're authorised across all three.
## Payment destinations
A **payment destination** registers where you want to receive payments. It's a single chain × token × wallet combo, encoded as an [ERC-7828 humanReadableInteropAddress](/api-features/payee-destinations).
Your session is a wallet-bound cookie with a 15-minute idle timeout, shared across `dashboard.request.network`, `auth.request.network`, and `api.request.network` — sign in once and you're authorised across all three.
## Payment destinations
A **payment destination** registers where you want to receive payments. It's a single chain × token × wallet combo, encoded as an [ERC-7828 humanReadableInteropAddress](/api-features/payee-destinations).
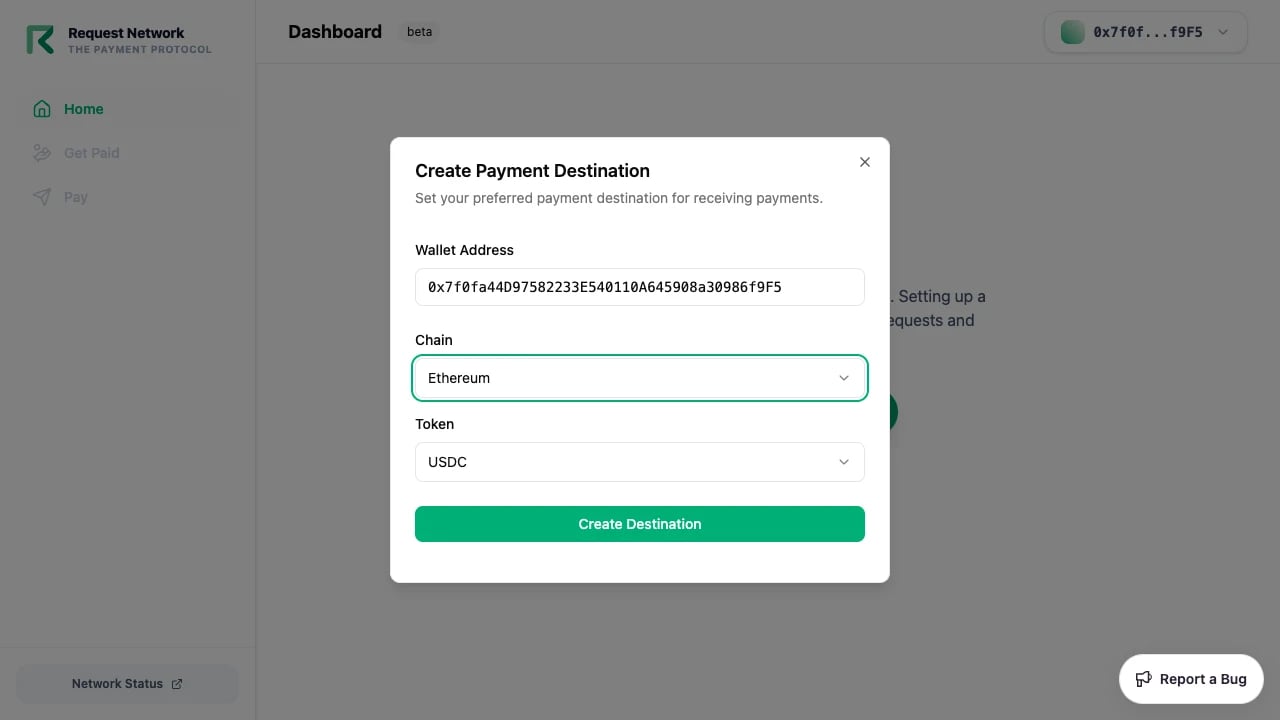 Supported chain × token combinations in the Dashboard UI:
| Chain | Tokens shown in the UI |
| -------------------------------------- | ---------------------- |
| Ethereum, Optimism, Base, Polygon, BSC | USDC, USDT |
| Arbitrum One | USDC, USDT0 |
| **Tron** | USDT (TRC-20) |
| Sepolia (testnet) | FAU, USDC, USDT |
The underlying API also supports USDC on Tron and additional tokens on some chains; the Dashboard UI exposes the curated set above. To use a token not in the UI, create the destination via the [Auth API](https://auth.request.network/open-api/#tag/payee-destination) directly.
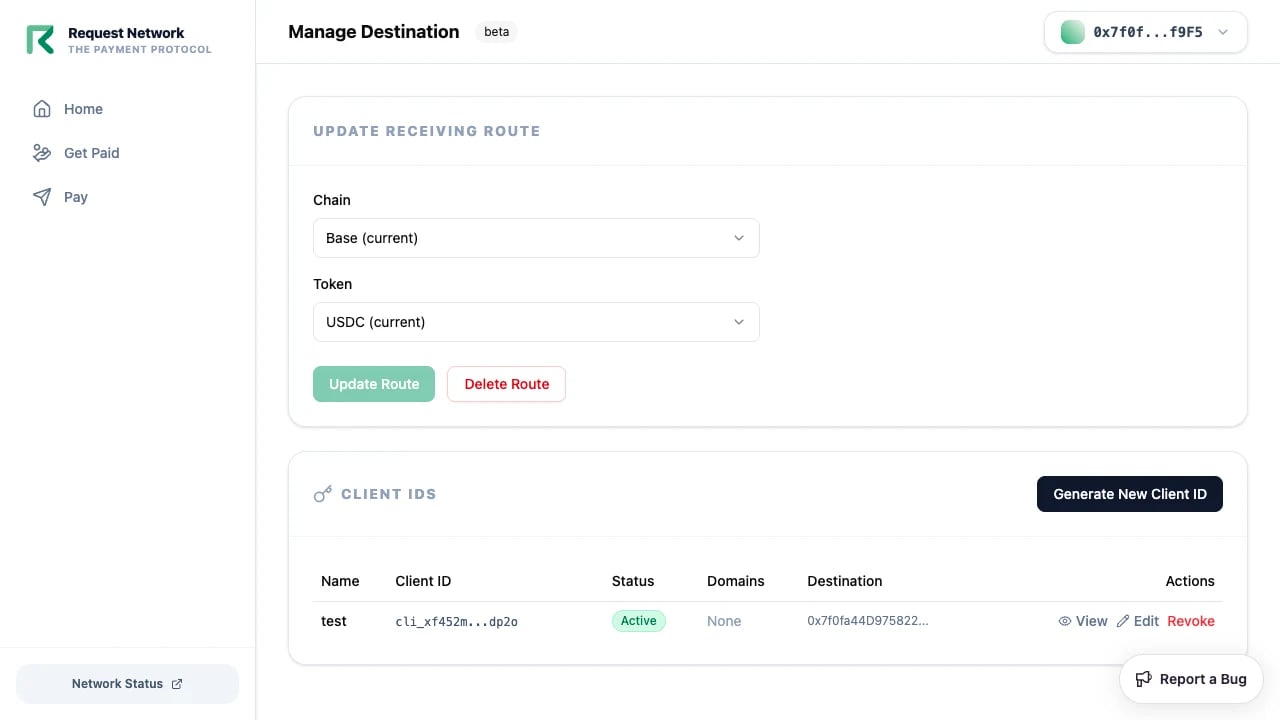
You can switch your active destination at any time via **Manage Destination → Update Receiving Route**.
## Client ID management
Client IDs are the credential the Dashboard (and your own apps) use to call the API on your behalf.
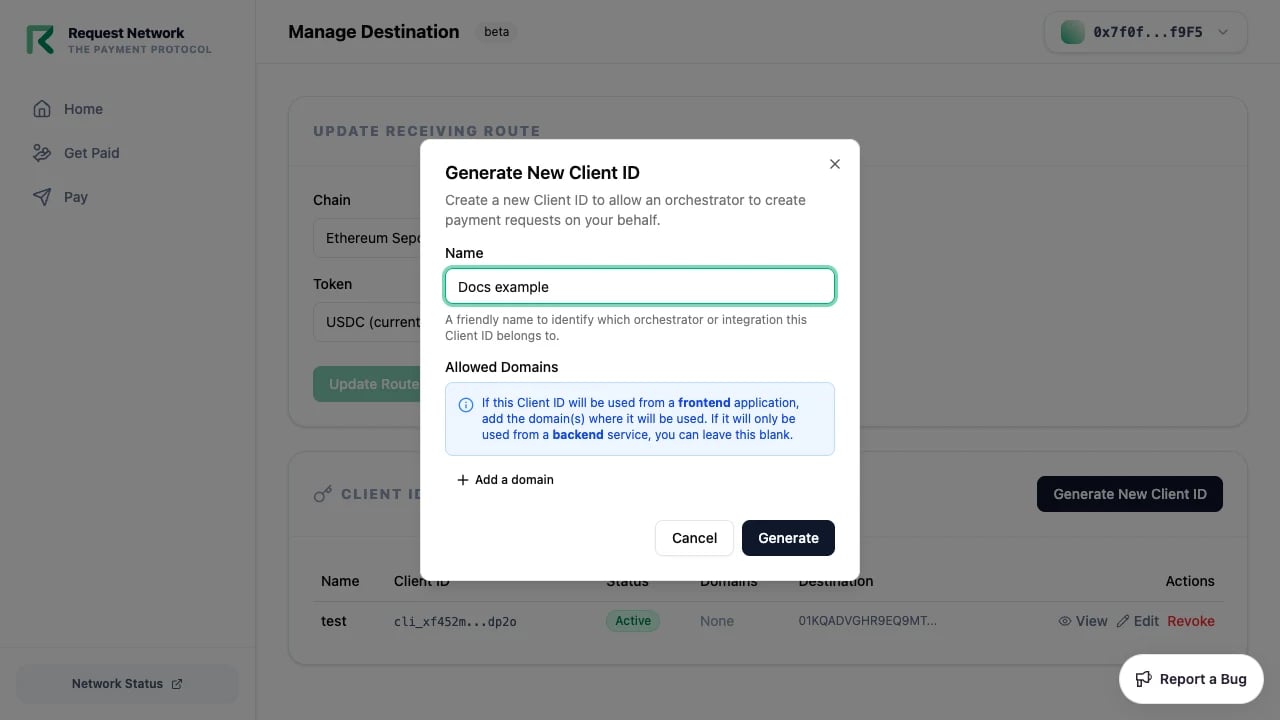
The Dashboard's **Generate New Client ID** dialog collects:
* A **label** (display name)
* **Allowed Domains** — one or more HTTPS origins (leave empty for backend-only Client IDs)
Supported chain × token combinations in the Dashboard UI:
| Chain | Tokens shown in the UI |
| -------------------------------------- | ---------------------- |
| Ethereum, Optimism, Base, Polygon, BSC | USDC, USDT |
| Arbitrum One | USDC, USDT0 |
| **Tron** | USDT (TRC-20) |
| Sepolia (testnet) | FAU, USDC, USDT |
The underlying API also supports USDC on Tron and additional tokens on some chains; the Dashboard UI exposes the curated set above. To use a token not in the UI, create the destination via the [Auth API](https://auth.request.network/open-api/#tag/payee-destination) directly.
You can switch your active destination at any time via **Manage Destination → Update Receiving Route**.
## Client ID management
Client IDs are the credential the Dashboard (and your own apps) use to call the API on your behalf.
The Dashboard's **Generate New Client ID** dialog collects:
* A **label** (display name)
* **Allowed Domains** — one or more HTTPS origins (leave empty for backend-only Client IDs)
 Advanced fields — `feePercentage`, `feeAddress`, `operatorWalletAddress`, `payeeDestinationId`, `defaultPreApprovalExpiry`, `defaultAuthorizationExpiry` — are only configurable via the [Auth API](https://auth.request.network/open-api/#tag/client-ids). Existing Client IDs created from the Dashboard can be edited (allowed domains) or revoked from the same screen.
For the full field reference, see [Client ID Management](/api-features/client-id-management).
## Webhooks
The Dashboard manages webhooks from the **Webhooks** section on the **Manage Destination** page. Each webhook endpoint is tied to a specific Client ID.
From this section you can:
* **Add a webhook** — enter the endpoint URL and choose the Client ID it belongs to. The Dashboard shows the signing secret once, immediately after creation — save it, since it isn't displayed in full again afterward.
* **Enable or disable** an existing webhook with a toggle, without deleting it.
* **Delete** a webhook endpoint.
See [Webhooks](/api-features/webhooks-events) for the payload format and how to verify signatures. Webhooks can also be managed programmatically via the [Auth API](https://auth.request.network/open-api/#tag/webhook).
## Get Paid
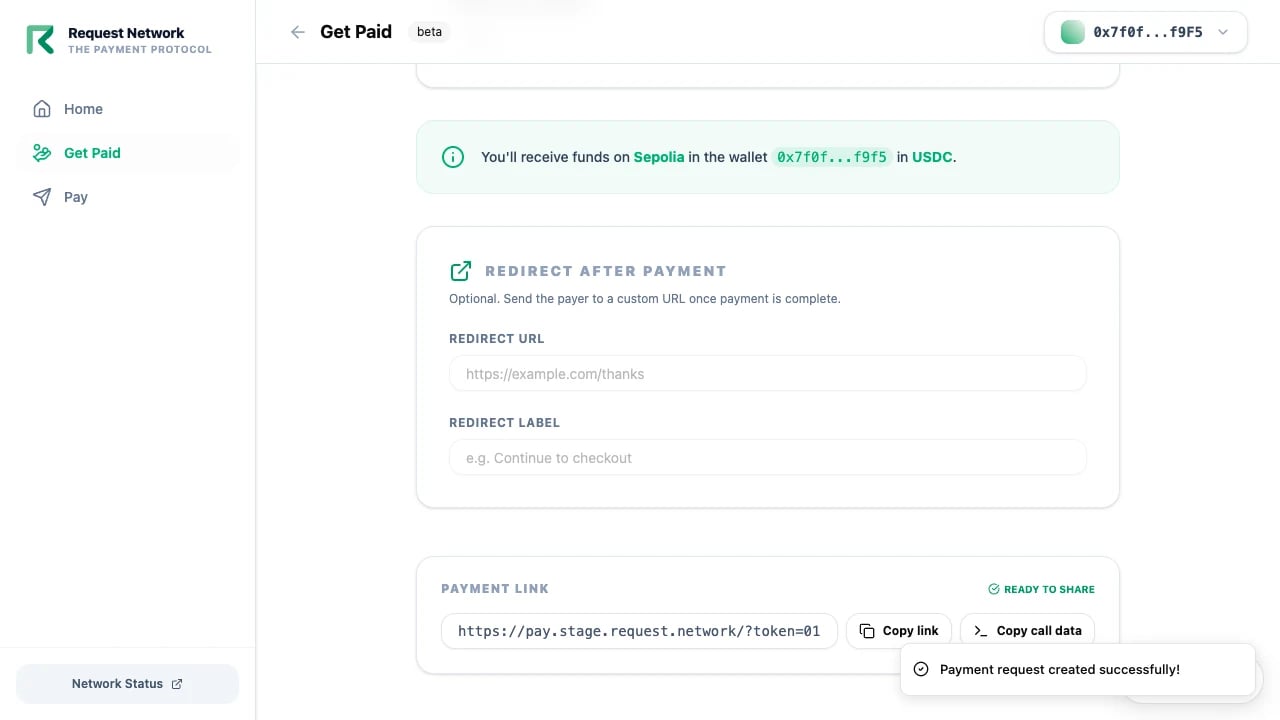
The **Get Paid** tab is your incoming-payments view. Create a request — amount, currency, optional reference and payer identifier — and the Dashboard generates a `pay.request.network` link to share.
Advanced fields — `feePercentage`, `feeAddress`, `operatorWalletAddress`, `payeeDestinationId`, `defaultPreApprovalExpiry`, `defaultAuthorizationExpiry` — are only configurable via the [Auth API](https://auth.request.network/open-api/#tag/client-ids). Existing Client IDs created from the Dashboard can be edited (allowed domains) or revoked from the same screen.
For the full field reference, see [Client ID Management](/api-features/client-id-management).
## Webhooks
The Dashboard manages webhooks from the **Webhooks** section on the **Manage Destination** page. Each webhook endpoint is tied to a specific Client ID.
From this section you can:
* **Add a webhook** — enter the endpoint URL and choose the Client ID it belongs to. The Dashboard shows the signing secret once, immediately after creation — save it, since it isn't displayed in full again afterward.
* **Enable or disable** an existing webhook with a toggle, without deleting it.
* **Delete** a webhook endpoint.
See [Webhooks](/api-features/webhooks-events) for the payload format and how to verify signatures. Webhooks can also be managed programmatically via the [Auth API](https://auth.request.network/open-api/#tag/webhook).
## Get Paid
The **Get Paid** tab is your incoming-payments view. Create a request — amount, currency, optional reference and payer identifier — and the Dashboard generates a `pay.request.network` link to share.
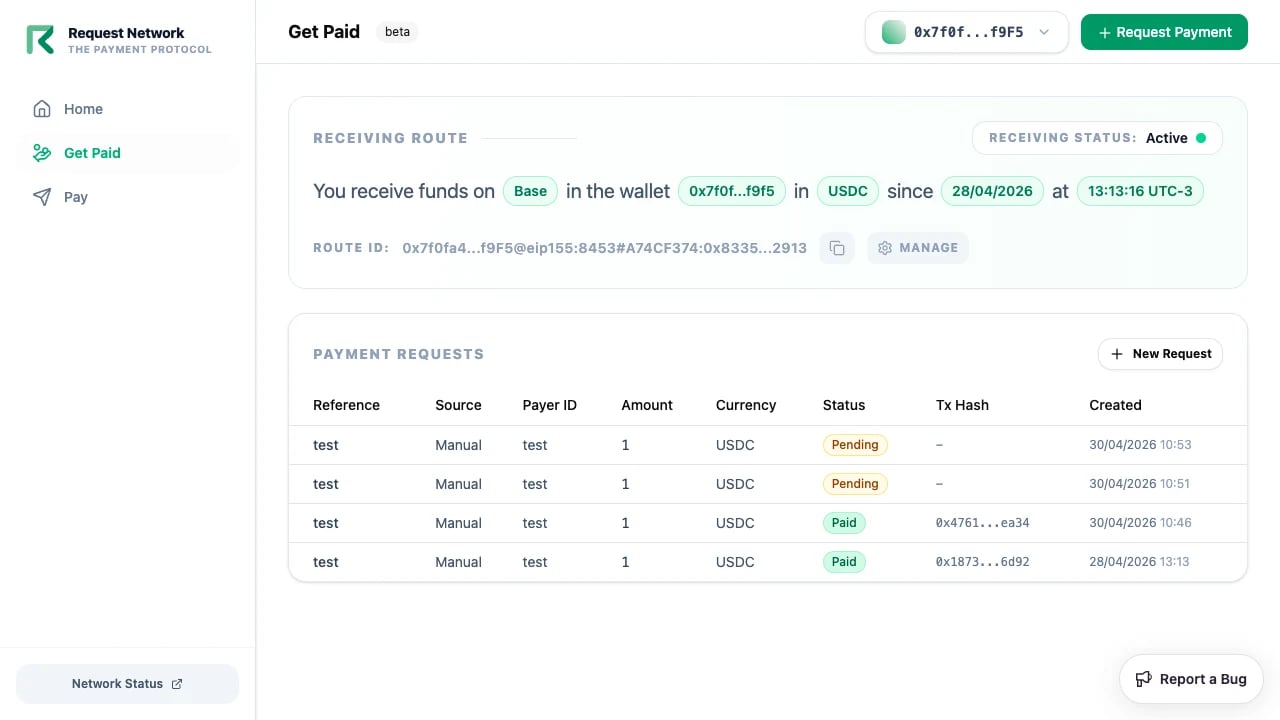 Each request shows status (Pending / Paid), the on-chain transaction hash once paid, and a copyable payment URL. Works identically for EVM and Tron destinations.
 ## Pay (outgoing)
The **Pay** tab is your outgoing-payments view. Create a single-recipient payout, sign the resulting transaction, and the Dashboard tracks settlement.
## Pay (outgoing)
The **Pay** tab is your outgoing-payments view. Create a single-recipient payout, sign the resulting transaction, and the Dashboard tracks settlement.
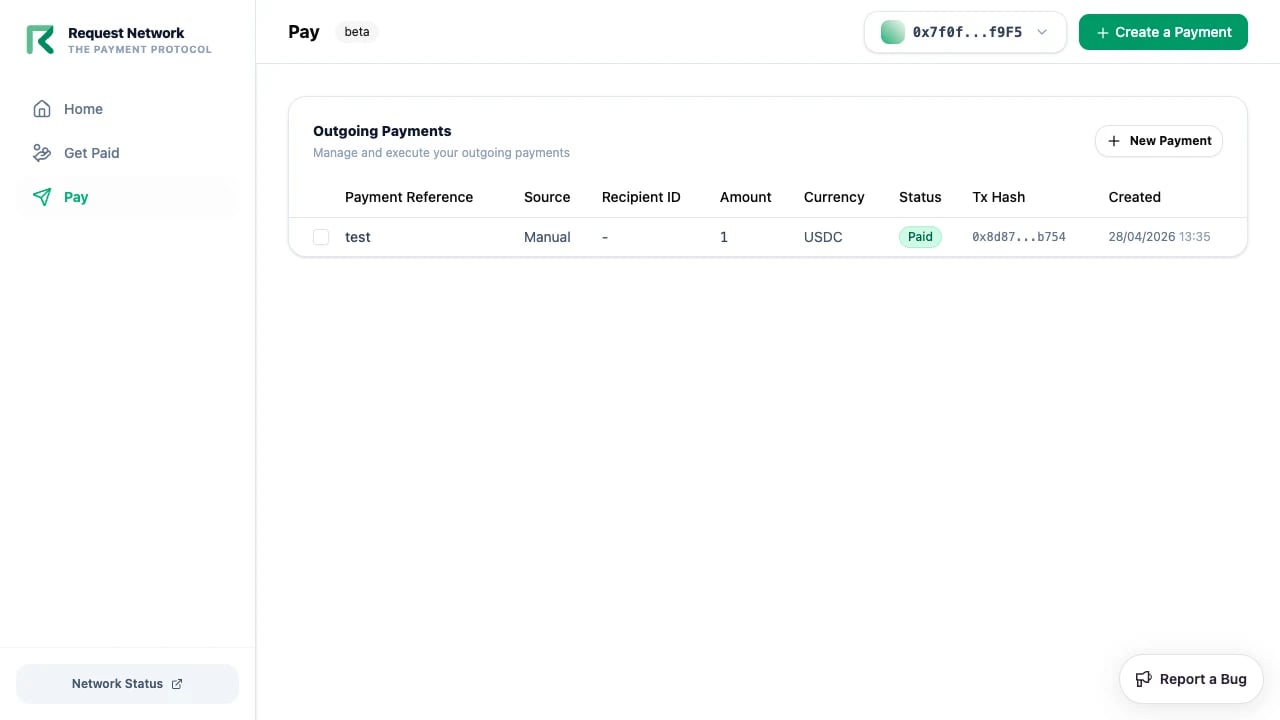 The Dashboard supports single-recipient payouts on both EVM and Tron, and lets you select multiple pending payouts and settle them together as a [multicall payout](/api-features/payouts#multicall-payouts) — reviewing every recipient before signing. For fully programmatic batch payouts, you can also call the API directly — see [Batch payouts](/use-cases/batch-payouts).
## What the Dashboard does *not* do
* It is not an admin / merchant control panel for downstream platforms — it's a user dashboard for your own wallet.
* It does not host the payer-side checkout — that's [Secure Payment](/tools/secure-payments) at `pay.request.network`.
## Open the Dashboard
Sign in with your EVM or Tron wallet to start.
## Related
End-to-end walkthrough using the Dashboard.
The payer-facing companion at pay.request.network.
The Dashboard supports single-recipient payouts on both EVM and Tron, and lets you select multiple pending payouts and settle them together as a [multicall payout](/api-features/payouts#multicall-payouts) — reviewing every recipient before signing. For fully programmatic batch payouts, you can also call the API directly — see [Batch payouts](/use-cases/batch-payouts).
## What the Dashboard does *not* do
* It is not an admin / merchant control panel for downstream platforms — it's a user dashboard for your own wallet.
* It does not host the payer-side checkout — that's [Secure Payment](/tools/secure-payments) at `pay.request.network`.
## Open the Dashboard
Sign in with your EVM or Tron wallet to start.
## Related
End-to-end walkthrough using the Dashboard.
The payer-facing companion at pay.request.network.